

Most homeowners can install a cold plunge themselves with basic tools, a free afternoon, and one non-negotiable step first: confirming your circuit type and drainage before anything gets bolted or plumbed. Check whether your chiller needs a standard 120V outlet or a dedicated 240V circuit, locate a drain or sump within hose reach, and clear enough space for the chiller to breathe. Get those three things right and the rest of the cold plunge installation is mostly patience and a manufacturer manual.
TL;DR:
- Most homeowners can install a cold plunge independently if they verify their circuit type and drainage options first, with a dedicated 20-amp GFCI circuit recommended for most chillers.
- Proper placement of the chiller within 8 feet of the tub on a level surface, along with grouping the pump and chiller, is crucial to optimize cooling efficiency and ease future maintenance.
- Water quality maintenance requires regular filter rinsing every 2 to 4 weeks and full water changes every 3 to 6 months, particularly when using ozone or UV sanitation systems.
- A dedicated outdoor or garage setup with waterproof flooring, insulation, and proper ventilation helps prevent damage from humidity, temperature swings, and condensation.
- For complex installations involving permanent plumbing or 240V power, hiring a licensed electrician or plumber is essential to ensure safety and code compliance.
Table of Contents
- What Do You Need Before Starting Your Cold Plunge Installation?
- How Do You Install a Cold Plunge Step by Step?
- What Are the Electrical and Plumbing Requirements for a Cold Plunge?
- Where Should You Place the Chiller and How Fast Will It Cool?
- How Do You Maintain Water Quality After Installation?
- What Should You Check Before First Use and How Do You Troubleshoot Issues?
- What Insulation Options Improve Cold Plunge Energy Efficiency?
- When Should You Hire a Professional Installer Instead of DIY?
- Tranquilora Cold Plunge Solutions and Installation Support
- Sources
- FAQ
What Do You Need Before Starting Your Cold Plunge Installation?
Before you unbox anything, lay out every part on the floor. Missing a single fitting mid-install is the fastest way to turn a Saturday project into a three-day one.
Your core system needs a tub, a chiller, a recirculating pump (some chillers have one built in), a filter, a sanitizing method like ozone or UV, and a cover. The cover isn’t optional gear to skip. It cuts heat gain by 40 to 60 percent, according to Nomad Labs, which means your chiller runs less and your electric bill notices the difference.
For the plumbing side, you’ll want:
- Hoses with a ¾ inch internal diameter (the standard for most home chillers)
- Barbed fittings and stainless steel hose clamps, not the zinc ones that corrode
- Bulkhead fittings if your tub requires through-wall connections
- Plumber’s tape and sealant for every threaded joint
Tools worth having on hand: a level, a hose cutter, a screwdriver set, an adjustable wrench, and a voltage tester so you’re not guessing about circuit type later. If you’re shopping for the tub itself, a portable foldable recovery tub or a hardshell option each change what plumbing you’ll need, so decide that before buying hoses.
How Do You Install a Cold Plunge Step by Step?
Start with the tub in place before you drill or route a single hose. Moving it later, once fittings are attached, is one of the most common causes of leaks and rework, according to ColdTubChiller’s build guide.
- Pick the final spot. Check that the floor can bear the weight of a full tub (water alone can add 400 to 800 pounds), confirm the surface is level, and leave room to access hoses and the chiller for future service.
- Route the plumbing in sequence. Water should flow tub outlet, then pump, then filter, then chiller, then back to the tub’s return inlet. Secure every clamp and leave a little slack, called a service loop, so you can disconnect a section without draining the whole system.
- Fill and leak test before powering anything. Fill the tub, run the pump alone, and watch every bulkhead and clamp for drips. This step alone catches most installation mistakes.
- Handle the electrical last. Confirm your circuit matches the chiller’s requirements, keep the power off until the leak test passes, and only then plug in. A dedicated GFCI-protected circuit is strongly recommended, and a hardwired 240V unit should go to a licensed electrician, not a weekend project.
- Run the first cool-down. Expect the chiller to take three to six hours to bring water down from room temperature, according to The Home Plunge’s setup guide. Watch the display, listen for anything unusual, and check for condensation that seems excessive for the room.
Pro Tip: Run the leak test with the water at room temperature, not cold. A slow drip is far easier to spot on a dry floor than on one already fogged with condensation from a chilled tub.
The actual physical setup, unboxing, positioning, and connecting hoses, typically takes 30 to 60 minutes once the site is prepped, per the same Home Plunge guide. It’s the drying, testing, and cooling that stretch the timeline, not the assembly.
What Are the Electrical and Plumbing Requirements for a Cold Plunge?
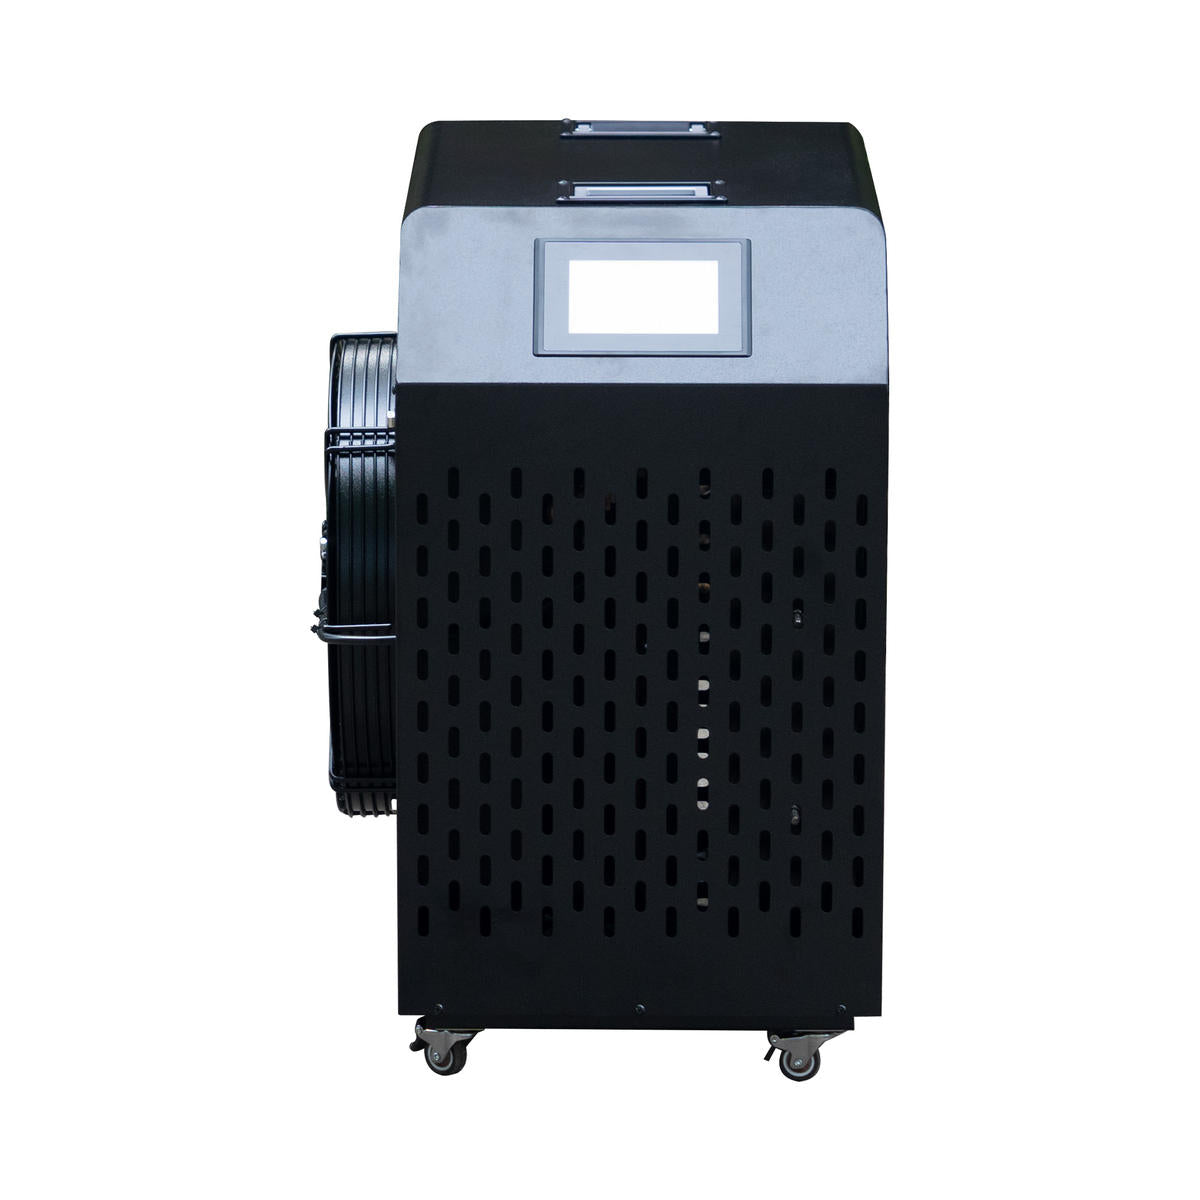
Chillers draw meaningfully more power at startup than during normal operation, and that spike is what trips breakers on shared circuits. A dedicated 20-amp GFCI receptacle is the standard recommendation from Hydro Systems’ installation guide, and it’s worth following even if your unit seems to run fine on a shared outlet during testing.
Key requirements to plan around:
- Voltage: most residential chillers run on 120V, though larger units need a 240V circuit
- Outdoor or garage setups: use weatherproof outlets, run cords through conduit, and never let a cord rest in a puddle path
- Drainage: a floor drain is ideal, but a sump pump tie-in, or a temporary submersible pump for hose discharge, both work
- Chemical runoff caution: if you’re draining to a garden or lawn, check your sanitizer type first since ozone breaks down quickly but chlorine-based routines need more careful disposal
Indoor installs need a real plan for splashes and humidity. A finished hardwood floor without waterproofing or a containment tray is a genuine risk, not just a cosmetic concern, according to Smartmak’s home setup guide. A tiled bathroom, garage, or basement with a floor drain removes most of that worry.
Where Should You Place the Chiller and How Fast Will It Cool?
Keep the chiller within about 8 feet of the tub, set on a level surface, at roughly the same height as the water line. That distance and elevation matter more than most people expect since longer hose runs and elevation changes both slow circulation and cooling, according to Hydro Systems.
- Leave 6 to 12 inches of clearance behind the fan exhaust, with 12 inches the safer target for airflow
- Keep outdoor chillers out of direct sun and away from rain exposure
- Group the pump, chiller, and UV or ozone unit together. Manufacturer guides consistently recommend this because it shortens plumbing runs and makes future servicing far less of a chore
On sizing, a rough rule of thumb pairs a 100 to 150 gallon tub with about a 1 horsepower chiller, according to ColdTubChiller. Undersize it and the unit runs constantly without ever quite reaching your target temperature. Expect cooling rates around 4 to 8°F per hour, though ambient room temperature and hose distance both push that number around, per Hydro Systems.
How Do You Maintain Water Quality After Installation?
Maintenance rests on three pillars: filtration, chemistry, and a scheduled drain. Ozone or UV systems handle sanitation as water passes through the loop, but they don’t replace periodic filter care or full water changes.
- Weekly: skim the surface and do a quick visual check for cloudiness or debris.
- Every 2 to 4 weeks: rinse the filter cartridge under a hose to clear trapped sediment.
- Every 4 to 6 months: replace the filter cartridge entirely, sooner if you plunge daily.
- Every 3 to 4 months: fully drain and refill a chilled system with ozone, per RecoveryStack’s maintenance guide. DIY setups without ozone or UV need much more frequent changes, sometimes monthly, depending on how often the tub gets used.
A starting sanitizer routine for many owners pairs light hydrogen peroxide dosing with periodic pH checks, though the right approach depends on your specific chiller and filtration setup. Test pH and sanitizer levels weekly rather than guessing by smell or clarity alone. If your setup lives outdoors, plan for winterizing before the first hard freeze, insulate any exposed plumbing runs, and check hose clamps monthly. Thermal cycling, the constant expansion and contraction from temperature swings, gradually loosens fittings even when nothing looks wrong.
Pro Tip: Keep a small notebook or phone note logging when you last rinsed the filter and drained the tub. It’s a five-second habit that saves you from discovering a cloudy tub the morning you actually wanted to use it.
What Should You Check Before First Use and How Do You Troubleshoot Issues?
Run through this before your first plunge:
- All fittings secured and no visible drips after the leak test
- Pump primed and running smoothly with no air gurgling in the lines
- Chiller level and positioned within the recommended distance from the tub
- Circuit confirmed correct with GFCI protection in place
- A thermometer placed in the water so you’re not relying on the chiller’s display alone
If a shared-circuit breaker trips during startup, that’s the compressor’s initial current draw. Move the unit to its own dedicated circuit rather than resetting the breaker repeatedly. Slow cooling usually traces back to one of three things: hoses too long, chiller too far from the tub, or a unit undersized for your gallon count. Air trapped in the lines shows up as gurgling or reduced flow, usually solved by bleeding the line and rechecking connections. If you’re ever unsure whether a circuit is adequate or a drain line is properly vented, that’s the moment to call a licensed electrician or plumber rather than troubleshoot further.
What Insulation Options Improve Cold Plunge Energy Efficiency?
An insulated tub shell is the single biggest lever for keeping your chiller from running around the clock. Hardshell tubs with built-in foam insulation hold temperature far longer than thin-walled portable models, which means less compressor cycling and a lower electric bill over a year of regular use.
For outdoor installations, wrap exposed plumbing runs in pipe insulation sleeves, the same kind used for outdoor spigots, to prevent both heat gain in summer and freeze risk in winter. A insulated cover matters just as much as the tub walls. As noted earlier, a quality cover cuts heat gain by 40 to 60 percent, which directly reduces how hard the chiller works between sessions.
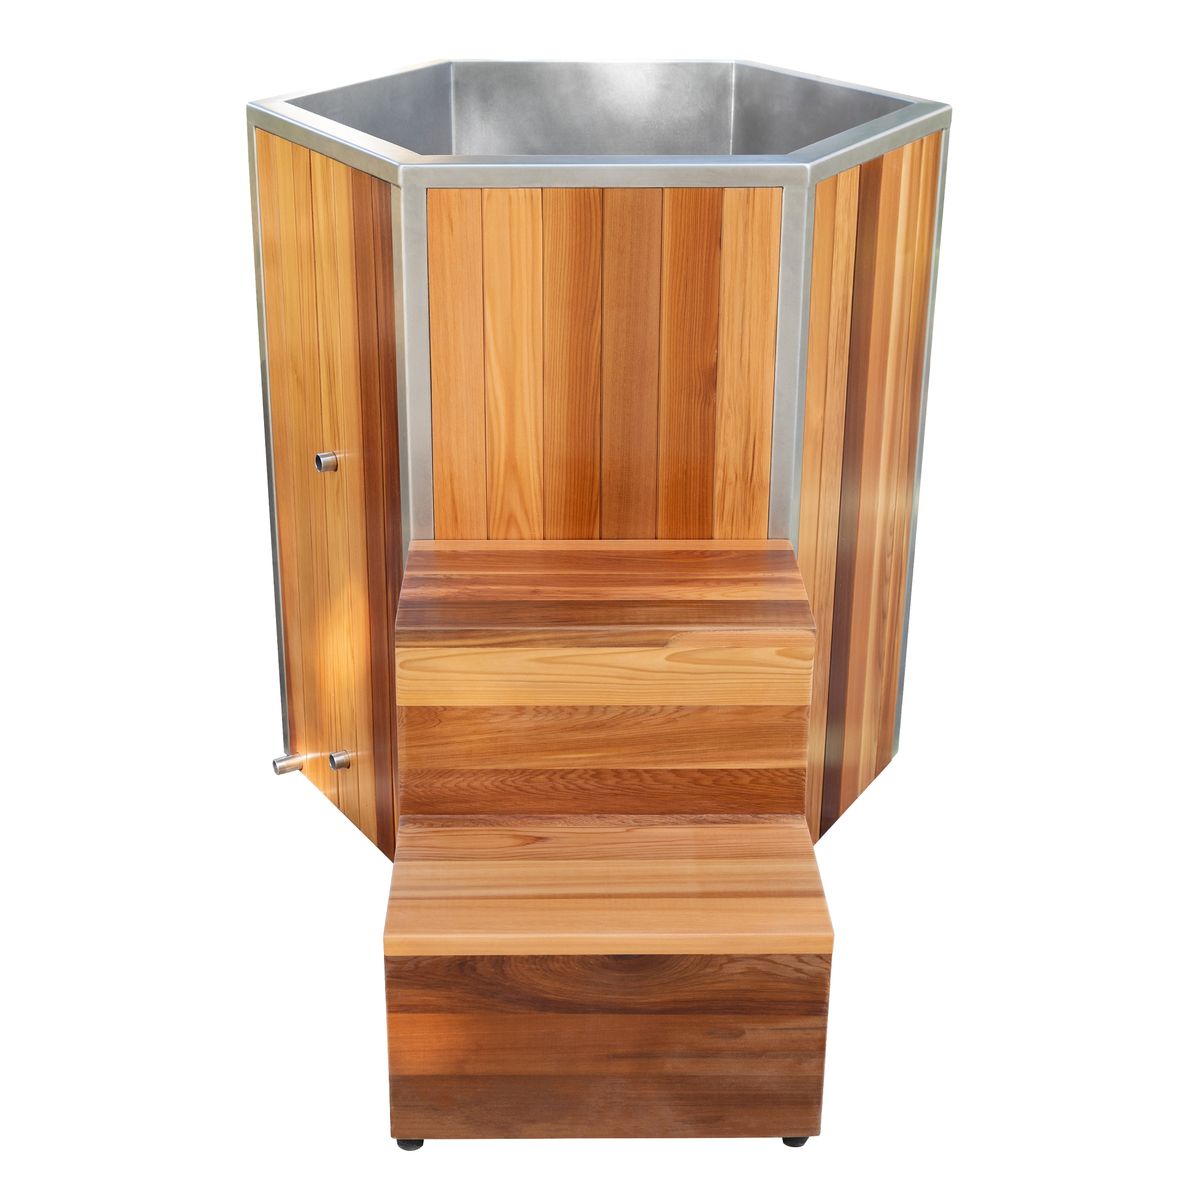
If you’re building a custom enclosure or shed around an outdoor plunge, rigid foam board on the interior walls helps stabilize the ambient temperature around the chiller itself, keeping it out of direct sun without trapping heat from its own exhaust. Just don’t seal the enclosure completely. Chillers need airflow to vent heat from the compressor, so any insulated housing needs a vent or gap sized to the unit’s clearance requirements. A wood-framed tub, like a cedar option, naturally insulates better than thin plastic or inflatable models, which is one reason cedar builds have become a popular middle ground between DIY inflatables and fully custom cold plunge rooms.
When Should You Hire a Professional Installer Instead of DIY?
If your setup involves a 240V hardwired chiller, permanent plumbing into a home’s drain system, or any structural work like reinforcing a floor for tub weight, bring in a licensed electrician or plumber. Most local codes require a permit for new electrical circuits or permanent drain connections, so check with your municipality before work begins, especially for a garage or basement conversion.
When vetting a contractor, ask specific questions rather than general ones:
- Have they installed a dedicated GFCI circuit for a similar appliance, like a hot tub or wine cooler, before?
- Will they pull a permit if your local code requires one for a new circuit?
- Can they confirm in writing what gauge wire and breaker size the chiller manufacturer specifies?
- Do they offer a walkthrough of the finished install so you understand shutoff locations and service points?
Get at least two quotes, and don’t automatically choose the cheapest one. Ask each contractor to reference the manufacturer’s own installation manual rather than working from general hot tub experience since cold plunge chillers have different startup current and clearance needs than a typical spa. A contractor unwilling to look at the manual before quoting is a signal to keep calling around.
Tranquilora Cold Plunge Solutions and Installation Support
Once you know your power and drainage situation, choosing the right tub and chiller combination gets much simpler. The Frostgard Pro Ice Bath Chiller works well for homeowners who already have a tub and just need a dedicated cooling unit that fits standard ¾ inch hose connections. For those starting from scratch and wanting the durability and warmth of natural wood, the Isvik Cedar Ice Bath pairs a ready-made vessel with cedar’s natural insulating qualities, cutting down on how hard your chiller has to work.
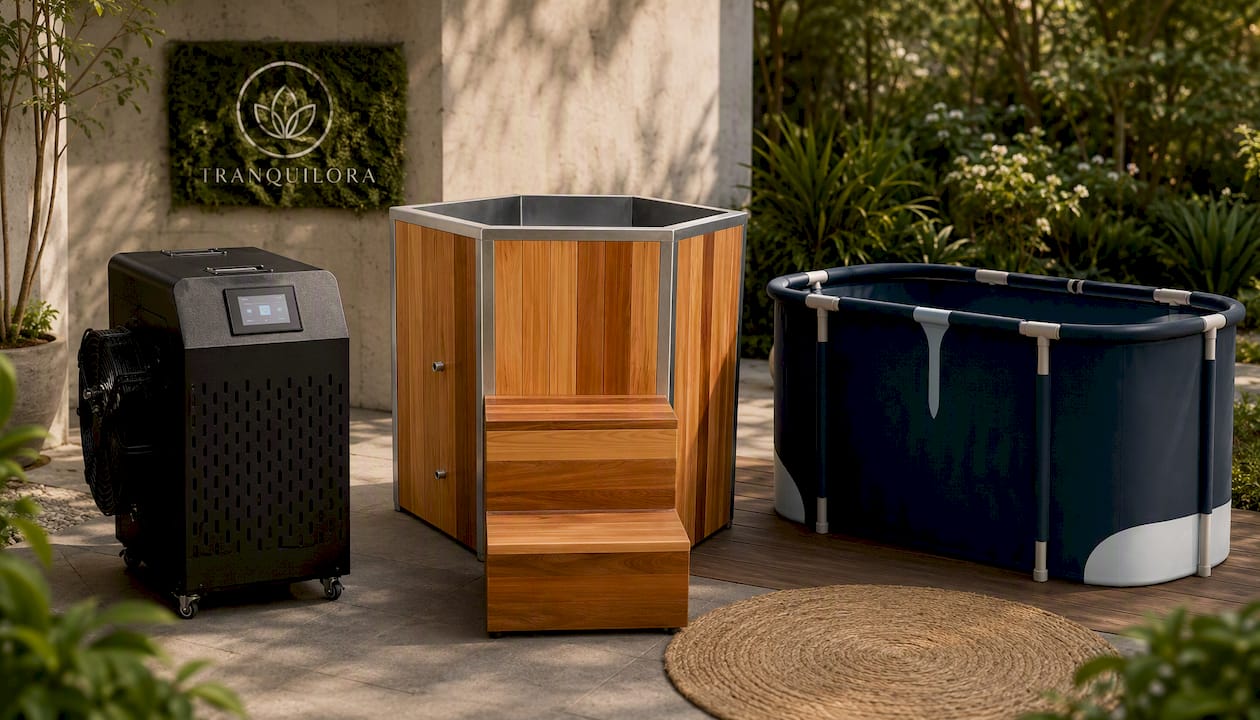
If your space or budget calls for something simpler, the Premium Portable Foldable Recovery Tub sets up with minimal plumbing and no permanent installation at all, a practical entry point if you’re not ready to commit to a hardwired chiller setup. Every product page includes manufacturer specs and manual references so you know exactly what circuit and clearance requirements apply before you buy. It is recommended to hire a licensed electrician for any 240V hardwired install or permanent drain connection. Browse the full Saunas & Cold Plunges collection to compare tubs and chillers side by side, or check the Recovery & Massage lineup if you’re building out a broader recovery setup alongside your plunge. When you’re ready, product pages list current pricing and specs so you can plan your install with real numbers in hand.
Sources
For the technical details behind this guide, the Hydro Systems installation PDF covers wiring diagrams and clearance specs in depth. RecoveryStack’s maintenance guide breaks down filtration cadence and water chemistry basics for ongoing care.
- Cold Plunge Chiller INSTALLATION GUIDE — Hydro Systems (April 2025)
- Cold Plunge Maintenance: Water Chemistry, Filtration, and Care (2026) — RecoveryStack
- At Home Cold Plunge: Complete Setup Guide (2026) — The Home Plunge
FAQ
How Much Does It Cost to Install a Cold Plunge?
Costs vary widely based on whether you choose a portable tub with a basic chiller or a hardshell system requiring dedicated electrical work. Current pricing for chillers, tubs, and portable options is listed on product pages, as equipment cost typically outweighs labor for most home installs.
What Are the Plumbing Requirements for Installing a Cold Plunge?
Most systems use ¾ inch internal diameter hoses connecting the tub outlet to the pump, filter, chiller, and back to the tub’s return inlet. You’ll also need a drainage plan, whether that’s a floor drain, a sump pump tie-in, or a temporary submersible pump for hose discharge.
How Many Minutes a Week Should You Cold Plunge?
There’s no single validated duration that applies to everyone, and cold plunge research on frequency and session length remains limited. Many people start with short, infrequent sessions and adjust gradually, but this isn’t medical guidance, and anyone with health concerns should talk to a doctor before starting a cold exposure routine.
What Happens After 30 Days of Cold Plunging?
Individual experiences vary considerably, and current evidence doesn’t support specific outcome claims tied to a fixed timeframe like 30 days. What’s more consistent is that people who stick with a routine tend to have dialed in their equipment maintenance by that point, including filter checks and water changes, since a poorly maintained tub becomes noticeably less pleasant to use well before the one-month mark.
Recommended
- Cold Plunge Therapy Benefits & Safety Guide
- How to Choose a Cold Plunge Tub for Home
- Frostgard Pro 1 HP Ice Bath Chiller | Valgard Works
Written with BabyLoveGrowth’s AI
This article is for general informational and educational purposes only and is not medical advice. Consult a qualified healthcare professional regarding health conditions or before making significant changes to your wellness routine.